We help people repair plastic
Repairing with Fusion Welding
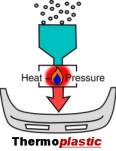
Outside of urethane, all other bumpers, and most other plastics on automobiles, are made from thermoplastic materials. This means they can be melted with the application of heat.
Thermoplastic parts are made by melting pellets of plastic and squirting the melted material into a mold, where it cools and resolidifies. This means that thermoplastic parts can be melted.
The most common thermoplastic automobile bumper material is TPO. TPO is fast becoming the most popular material for all sorts of interior and underhood plastics as well.
IMPORTANT NOTE: TPO also goes by TEO. If you have a part with the TEO symbol, repair it exactly the same way that you would repair a TPO part.
-
TPO - Thermo Plastic Olefin
-
TEO - Thermo Elastic Olefin
TPOs can be welded using the fusion technique described on this page, but our FiberFlex rod often makes an easier and stronger repair on TPO. The third most common bumper material, Xenoy, is best repaired using the following Thermoplastic Fusion technique.
· Line up the outer surface of the tear with 6481 Aluminum Body Tape or with clamps.
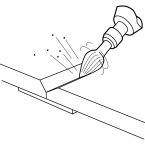
· V-groove halfway through the backside of the part with either the 6121-T Teardrop cutter bit or melt a v-groove in by turning the tip of the welder at an angle.
· Remove the paint in the area surrounding the v-groove and radius into the v-groove with coarse sandpaper.
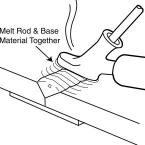
Melt the Rod Together with the Base Material
· Set the temperature setting of your airless plastic welder to the setting that's appropriate for the welding rod you selected in the identification process. In most cases, the welding rod should melt cleanly and not be discolored (the only exception would be nylon, where the rod should turn a light brown).
· Lay the welder tip on the surface of the plastic and slowly melt the rod into the v-groove. Pull the welder toward you so you can see the welding rod fill the v-groove as you make your pass.
· Lay down no more than 2 inches of welding rod into the v-groove at a time. Remove the rod from the welder tip, and before the melted rod has time to cool down, go back over it with the hot welder tip and thoroughly melt the rod together with the base material. It helps to press into the plastic with the edge of the welder tip to mix the materials, then go back and smooth it out. Keep the heat on it until you have a good mix between the rod and base.
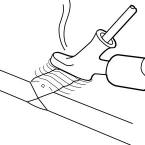
V-Groove and Weld Opposite Side
After the weld on the backside cools, repeat the v-grooving and welding process on the opposite side.
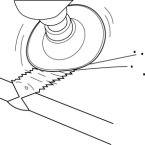
Grind Weld to a Smooth Contour
· If you need to refinish the plastic, grind weld to a smooth contour with coarse sandpaper. Grind the weld slightly flush so that filler can cover the welded area completely. Follow instructions for Step 4 for filler application.
plastik welder hdpe tank welding pastic welding hot air plastic welding gun urethane supply company airless plastic welder
Product Suggestions

