We help people repair plastic
A Lesson in Plastic Repair: The turret canopy from B-25J “Panchito.” By Scott Bixler
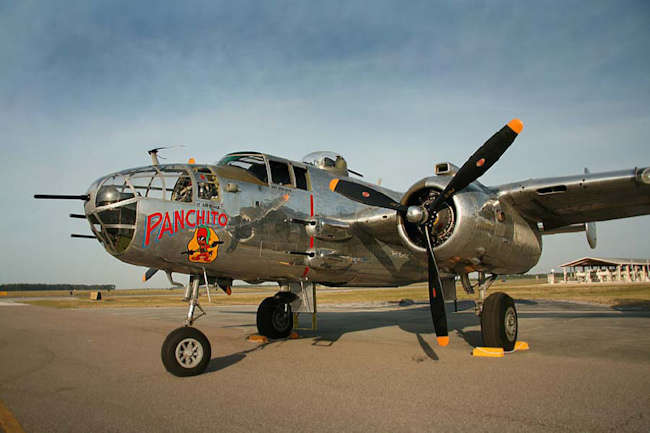
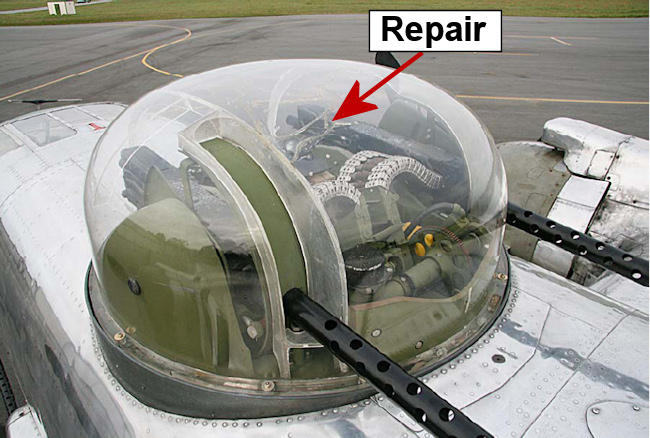
There was a nervous feeling in the pit of my stomach as I drove home from work with a piece of history sitting in the back of the van. The "piece" was the turret canopy from the B-25 "Panchito." The nervousness was there because the canopy is irreplaceable and people were counting on me to repair it on time so they could fly the bomber at the season’s first scheduled appearance at AirFest in Tampa. Although I was a little nervous about the project, I was also very excited about it. I never dreamt I would have the opportunity to work on part of the plane I built a model of as a kid. If there was ever a project where you thought to yourself, "don’t screw this up because if you do, there won’t be a second chance," this was it.
DAV sponsored B-25 "Panchito" owner Larry Kelly was introduced to me by one of his crew members at AirVenture 2006. He explained the damage to the turret canopy was caused by someone who slipped and broke their fall with the canopy while putting a cover on the plane. (I’m glad I’m not that guy!) The subsequent hole was temporarily patched with a pair of doubler sheets bolted to the canopy, sandwiching the damaged area between. After looking the canopy over, Larry asked if I could repair it with a more permanent and better-looking method; I thought I could.
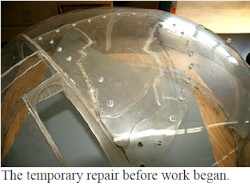
The temporary repair wasn’t a pretty sight and the sandwich created a serious heat problem. The amount of heat trapped between the two pieces of acrylic was enough to warp and distort the original plastic. The extent of heat damage was hidden somewhat by the patch and when I removed it, the true scope of the repair became apparent. As it turned out, the heat damage was more difficult to contend with than the cracks.
On top of the canopy, the edges of the cracks warped a few inches in both directions over a relatively short distance. There was also a gap between the pieces caused by shrinkage from the heat. A chunk, roughly the shape of New York, 5 inches long by 2 to 3 inches wide was completely missing. On the front side, an 8 inch stress crack had formed, starting at a bolt hole on the bottom mounting ring. Near the machine gun slots there were several unusual fissures and a short crack squarely in between the guns. It was going to be a lot of work!
I started the repair by correcting as much of the distortion as possible. Distortion is a bad thing, particularly in rigid plastics. When you try to reshape it cold, a tremendous amount of stress is put into the material. If this stress is locked into a repaired piece, any nick or chip would cause the plastic to crack or break.
Rather than doing a cold realignment as you would for very minor problems, I heated the affected area until it became elastic and pressed the seams closer together as it cooled. This technique is not without consequences. With hard plastics, heat applied to a localized area can make bad things to happen. For example, if you heat a portion of an acrylic part to realign it, the plastic can expand substantially in a small area without becoming elastic. The stress this expansion creates can start a crack or expand an existing crack. I broke into a cold sweat when I saw (and heard) a crack lengthen when I heated the canopy to realign the warped edges. Thankfully, the crack only lengthened by about a quarter inch, but it could have been much worse.
The reason for removing an existing patch (other than cosmetics) is because of the high amounts of stress associated with a bolted repair. Bolts cause localized stress from clamping pressure and the patch itself causes stress due to differential expansion and contraction. The differential expansion of the patch and the base material pushes or pulls against the bolts which focuses all the stress into the bolt holes. The combination of the clamping stress and expansion stress can exceed the plastic’s ability to deform, causing cracks that radiate from the bolt holes. By spreading the forces out over a wider area and by eliminating the clamping force all together, PlastiFix can make a more durable repair.
Before bonding the parts back together, the plastic must be perfectly clean and free of wax or oil. 1000-A Super Prep
Plastic Cleaner from Polyvance does an excellent job at this without harming the plastic. With plastic repair, all cleaning should be done first to prevent contaminants from getting into the repair area.
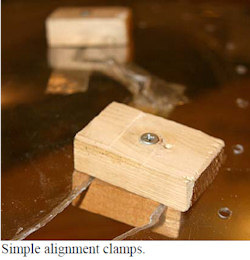
Once the canopy was clean, some stabilizing clamps were made using 2 small pieces of wood and a screw. (picture) Clamps were used to ensure alignment of the parts and so there would be no shifting parts while the PlastiFix cured. The cracks were also backed with foil tape to keep PlastiFix from dripping out of the v-groove. Foil tape is perfect for this because it helps with alignment and the tape won’t stick permanently to PlastiFix when it’s cured.
Prepping the crack is relatively simple, although time consuming. Carefully bevel the edges of the cracks to form a vgroove with about a 45° angle on both sides using a rotary tool with a tear-dropped cutter bit. The beveled edge should go nearly all the way through the material. Sand the beveled edge and radius the top edge of the bevel to smooth the transition from PlastiFix to base material. Once this is done, PlastiFix can be applied to the v-groove.
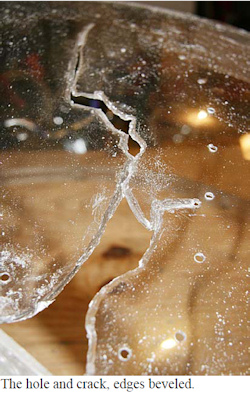
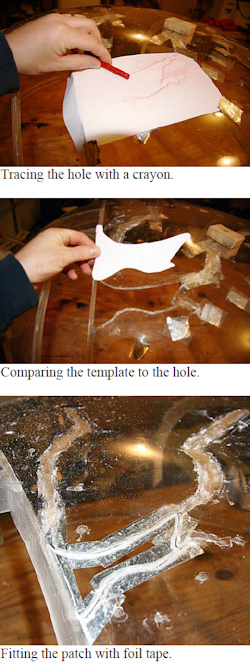
To fill the New York state shaped hole, I cut a patch from a 3/32” piece of Lexan. I traced a pattern of the hole onto the Lexan and cut the piece using a fiber disk on a Rotary tool. I beveled the edge of the patch to fit inside the hole and used foil tape to hold it in place.
Next, I filled all the cracks with PlastiFix, 1/16” or less at a time. It took 3 to 4 layers to completely fill the 3/32” thick canopy plastic. 30 minutes after applying the PlastiFix, the tape was removed from the backside and the clamps were removed. The gaps where the clamps were, were then filled. When the outside was completely filled and cured, the whole process was repeated on the inside, starting with making a slightly shallower v-groove.
Once the backside is complete, the task of sanding and polishing begins. This is where a PlastiFix repair really shines, literally!
PlastiFix has the incredible ability to be polished to the same level as the acrylic it’s bonded to. Why does it polish so nicely? The answer is because they are essentially the same material. With enough work, you will not be able to see where you sanded and polished the repair in a reflection. However, you can still see the joint when looking through the plastic because PlastiFix is not quite as clear as molded acrylic.
To polish the repair, I used a Polyvance Headlight Magic Headlight Restoration Kit. This kit is inexpensive for the quality of the materials it contains. It comes with wet-sanding pads ranging from 120 grit all the way up to 12,000 grit (yes folks, 12,000 grit!), two polishing cloths and some buffing solution. There was plenty of material to do the inside and outside of the canopy and the sanding pads still looked like new when I was finished. The canopy had a really nice shine when it was done and from the outside of the plane, I don’t think anyone would ever notice its been repaired.
To keep the canopy padded when it was put back in place and to insulate it from engine vibrations, I used some Camper Seal Tape that was donated from the nice folks at M-D Building Products for this project. The tape was the right width and thickness for the job and will allow the canopy to move slightly as it expands and contracts.
For those of you wondering how long the repair took, I spent a total of 17 hours on the job. That is a long time, but it sure beats coughing up $7000+ and waiting for years for a part like this. It makes me proud knowing I helped keep an original part of a historic aircraft operational. I think there are many other irreplaceable parts like this that would benefit from this type of repair.
Products Used For This Repair

